
Ready to take a tandem skydiving jump? It's an exciting time, but it also requires you to make sure you're actually prepared. Fortunately, getting prepared for a jump doesn't have to be difficult.
With the right skydiving procedure you'll be up and ready to go, so you can fully enjoy the experience. Here are six steps you'll want (and need) to go through before the jump, along with some information on the jump itself.
Step 1: Learn About the Dropzone
Knowing about the dropzone matters when it comes to proper skydiving procedure. Some things you should find out about it include how long it's been in business, and what kind of safety rating it has.
Also take a look at the history of accidents there, and the reviews on social media. The more you know, the more likely it is that you can find a dropzone you're comfortable with, and that's safe for your skydiving interests.
Most dropzones are very careful, but some have better safety ratings than others. Safety should always be your first priority. Sure, the jump is meant to be fun! But it's not fun if it's risky and frightening, or if you aren't sure about the credentials of the instructor.
That's why it's such a good idea to learn all you can about the dropzone you're considering. You'll have peace of mind, and your skydiving experience can be a better one.
Step 2: Get a Good Night's Sleep
There are two problems with sleeping poorly, or not long enough, the night before your skydiving adventure. First, being drowsy doesn't make for as good of an experience, and can also reduce the safety of your jump.
Second, over-caffeination can also cause problems with the skydiving process. You might feel jumpy, jittery, or excessively nervous. You may also be prone to distraction and have trouble focusing on the topic at hand, particularly during ground instruction.
Step 3: Eat Breakfast
Even if you're not normally a breakfast person, you'll want to have something in your stomach. Don't skydive hungry! You'll be headed up to at least 9,000 feet, and maybe even double that, which isn't a good thing to do when you don't have food in your stomach.
You also need to have the energy to skydive safely. It can take a lot out of you, so making sure you get a healthy breakfast will help ensure that you have the strength and stamina to make your jump safely and with more enjoyment, too.
Step 4: Wear the Right Clothing
Make sure you're not wearing anything loose or baggy. When you're in freefall, you could hit speeds of as high as 120 mph. You don't want any of your clothes flapping around in that kind of wind, because it can be very uncomfortable. Wearing fitted clothing is the best way to avoid that problem.
You could even end up with clothes that get damaged if they're blowing around too much, and the flapping of clothing at that speed can be loud and startling. Fitted options will make your jump much better.
Step 5: Arrival and Check-in
When you arrive at the dropzone, you usually have a specific check-in process you'll go through. You'll also meet your instructor. Getting there in plenty of time ensures that you're not rushed, and that you have time to interact a bit and get comfortable before you actually start the on-site preparations to make your jump.
Make sure to observe all the required measures, especially since a large number of dropzones have adopted new safety precautions due to COVID.
Step 6: Orientation & Ground School
During the jump, you're responsible for your own safety. Your instructor will help, of course, but they're also relying on you to do what you're supposed to. It helps keep both of you protected.
Because of that, it's vital that you listen to everything you're taught in ground school. Take it seriously, and do what you're supposed to do. The more you follow skydiving procedure, the more you can enjoy your experience, reduce any risk, and get the most out of your jump.
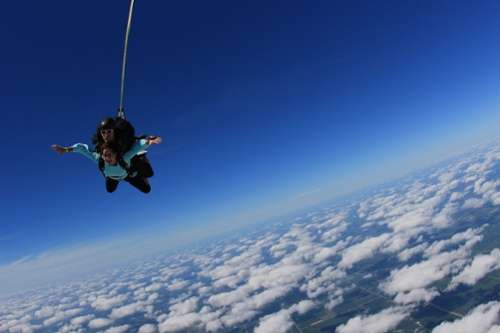
Step 7: Jumping
When you get ready to make your skydive, you'll quickly climb to altitude before reaching your jumping height. Then, you and your instructor will leave the plane, making sure there's enough time between you and other jumpers to allow for a controlled, safe descent.
A licensed instructor may also carry camera equipment to take photos and videos of your descent. Those can be great to look back on, and to show to family and friends, once your adrenaline settles down, and you're back to earth.
Step 8: Aftermath
After you land and get out of your gear, you can do whatever you'd like with the rest of your day. It's all yours! Your videos, photos, and other jump mementos will be available to you, if you want them. If your stomach can handle it, you might want to get something to eat, as well.
But no matter what you choose to do next, you can have the satisfaction of knowing you got through the skydiving procedure and your tandem jump. Whether you never do it again or come back the next week, you can say you did it.
Ready to Take on Your Skydiving Adventure?
We're here when you're ready, so you can start on your tandem jump experience. Booking your jump is easy when you come to us, and you can ask questions, get information, and work with friendly people who want to make your jumping adventure a good one. Our tandem skydiving guide can help you get started.
It's packed with the information you need to decide if booking a skydiving adventure is right for you. By learning more, and following skydiving procedures for safety, you can have a great jump!

